The purpose of the Material Editor is to add material properties like texture and color to the parts or assemblies.
Inputs
1. Run 3DCS Variation Analyst.
2. Open DCS Converter from the Tools menu.
3. Open wheel.hsf in the DCS Converter.
This will open the Wheel Assembly.
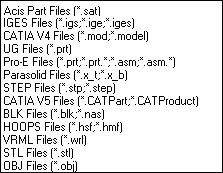
Note: The following files can be opened with DCS Converter:
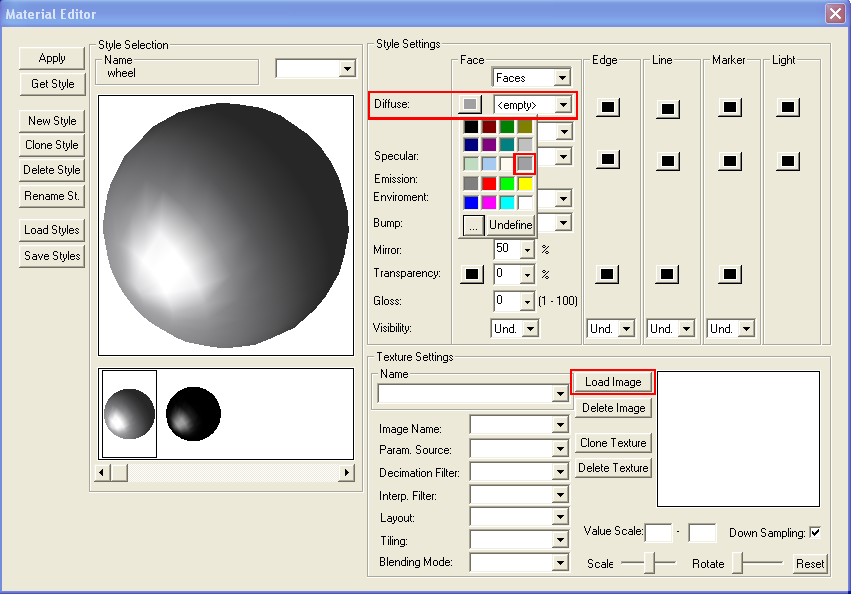
4. Go to Tools/Material Properties and open Material Editor dialog box.
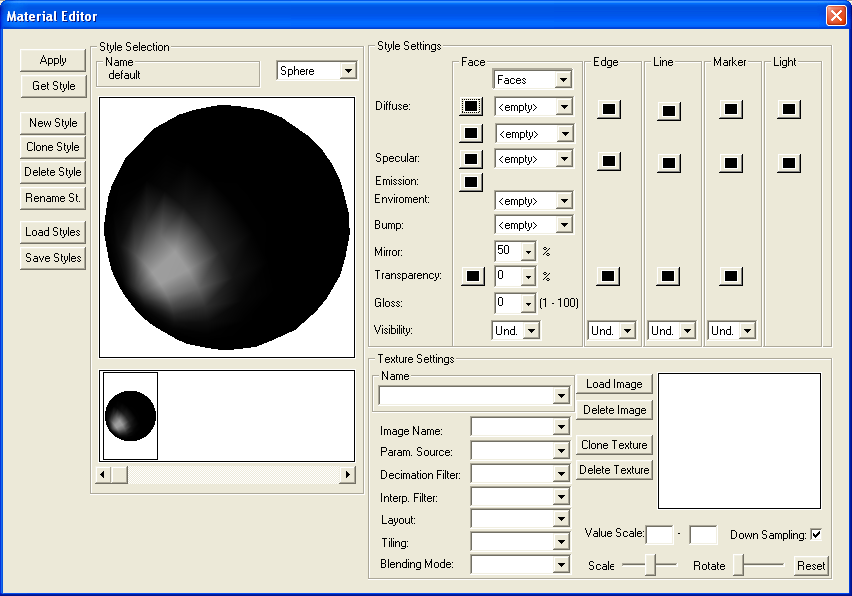
•Apply: applies the Style to selected part.
•Get Style: allows to copy the Style from selection.
•New Style: creates new Style.
•Clone Style: creates duplicate Style.
•Delete Style: deletes the selected Style.
•Rename St. (style): renames the selected Style.
•Load Styles: loads previously saved Styles.
•Save Styles: save the new created Styles.
•Style Selection (Styles are sets of parameters that you can assign to objects to determine their appearance).
![]() Name: shows the name of the selected Style.
Name: shows the name of the selected Style.
•Style Settings
![]() Diffuse: is the color that an object reflects when illuminated by "good lighting," that is, by direct daylight or artificial light that makes the object easy to see. This is the basic color of the objects.
Diffuse: is the color that an object reflects when illuminated by "good lighting," that is, by direct daylight or artificial light that makes the object easy to see. This is the basic color of the objects.
![]() Specular: is the color of highlights on a shiny surface. The highlights are reflections of the lights that illuminate the surface. For a naturalistic effect, set the specular color to the same color as the key light source, or make it a high-value, low-saturation version of the diffuse color. If you set the specular color to match the diffuse color, will give a matte effect, making the material appear less shiny. This is the color modulation applied to directly reflected lights.
Specular: is the color of highlights on a shiny surface. The highlights are reflections of the lights that illuminate the surface. For a naturalistic effect, set the specular color to the same color as the key light source, or make it a high-value, low-saturation version of the diffuse color. If you set the specular color to match the diffuse color, will give a matte effect, making the material appear less shiny. This is the color modulation applied to directly reflected lights.
![]() Emission: is the color supplied directly by the object.
Emission: is the color supplied directly by the object.
![]() Environment: is used for setting up atmospheric and background effects. This is the environment map applied to the object.
Environment: is used for setting up atmospheric and background effects. This is the environment map applied to the object.
![]() Bump: bump mapping makes an object appear to have a bumpy or irregular surface. When you render an object with a bump-mapped material, lighter (whiter) areas of the map appear to be raised, and darker (blacker) areas appear to be low. This is the bump map applied to the object.
Bump: bump mapping makes an object appear to have a bumpy or irregular surface. When you render an object with a bump-mapped material, lighter (whiter) areas of the map appear to be raised, and darker (blacker) areas appear to be low. This is the bump map applied to the object.
![]() Mirror: quantifies the Environment applied, as a percentage.
Mirror: quantifies the Environment applied, as a percentage.
Transparency: controls how transparent the material is. This value is a percentage: at 100.0, the material is completely transparent; at lower values, the material is partly opaque; and at 0.0, the material is completely opaque.
![]() Gloss: (or dullness) depends on the size and intensity of its specular highlight. In the Material Editor, the Glossiness spinner affects the size of the specular area, and the Specular Level spinner affects the intensity of the glossiness. When the Specular Level is too high, and Glossiness is too low, you can get harsh backlights on your surfaces.
Gloss: (or dullness) depends on the size and intensity of its specular highlight. In the Material Editor, the Glossiness spinner affects the size of the specular area, and the Specular Level spinner affects the intensity of the glossiness. When the Specular Level is too high, and Glossiness is too low, you can get harsh backlights on your surfaces.
•Visibility: controls the display of hidden lines and markers. This is NOT to be confused with the choice of the hidden line algorithm itself. The default value is "visibility = on".
•Texture Settings
![]() Image Name: allows the user to select a loaded image for which the settings will be modified/optimized.
Image Name: allows the user to select a loaded image for which the settings will be modified/optimized.
![]() Param. (parameterization) Source
Param. (parameterization) Source
![]() cylinder map: automatically creates the texture map based on a cylindrical mapping.
cylinder map: automatically creates the texture map based on a cylindrical mapping.
![]() object: n/a
object: n/a
![]() physical reflection: an alternative setting for environment mapping. When set, this calculates the environment coordinates as a reflection between the normal (to the item being textured) and the view vector. The result is that the environment map is not held at a fixed position.
physical reflection: an alternative setting for environment mapping. When set, this calculates the environment coordinates as a reflection between the normal (to the item being textured) and the view vector. The result is that the environment map is not held at a fixed position.
![]() reflection vector: this is the default setting for an environment map. It matches the behavior of OpenGL environment mapping, in that the environment is held at a fixed position along the view vector.
reflection vector: this is the default setting for an environment map. It matches the behavior of OpenGL environment mapping, in that the environment is held at a fixed position along the view vector.
![]() sphere map: automatically creates the texture map based on a spherical mapping.
sphere map: automatically creates the texture map based on a spherical mapping.
![]() surface normal: the surface normal computed for the local screen pixel.
surface normal: the surface normal computed for the local screen pixel.
![]() uv: used for traditional image based texture maps. The parameterization source comes from a user supplied (u,v) coordinate set.
uv: used for traditional image based texture maps. The parameterization source comes from a user supplied (u,v) coordinate set.
![]() world: a three-valued parameter (XYZ) corresponding to the surface pixel's 3D world coordinate position.
world: a three-valued parameter (XYZ) corresponding to the surface pixel's 3D world coordinate position.
![]() Decimation Filter
Decimation Filter
![]() mipmap: MIP maps (also mipmaps) are pre-calculated, optimized collections of bitmap images that accompany a main texture, intended to increase rendering speed and reduce artifacts.
mipmap: MIP maps (also mipmaps) are pre-calculated, optimized collections of bitmap images that accompany a main texture, intended to increase rendering speed and reduce artifacts.
![]() Interp. Filter
Interp. Filter
![]() bilinear: The texture data from the four closest texels to the texture coordinate are blended using a weighted average (bilinear interpolation).
bilinear: The texture data from the four closest texels to the texture coordinate are blended using a weighted average (bilinear interpolation).
Note: Texels are HOOPS image texture elements.
![]() stochastic: A faster form of interpolation that adds "noise" to the texture coordinates in order to simulate bilinear interpolation. The word stochastic means random, pertaining to chance.
stochastic: A faster form of interpolation that adds "noise" to the texture coordinates in order to simulate bilinear interpolation. The word stochastic means random, pertaining to chance.
![]() Layout
Layout
![]() rectilinear: normal texturing assumes "rectilinear", a simple 0->1 mapping in x & y.
rectilinear: normal texturing assumes "rectilinear", a simple 0->1 mapping in x & y.
![]() spherical: Environment mapping assumes "spherical", a sort of distorted polar coordinates, as defined by OpenGL for environment mapping.
spherical: Environment mapping assumes "spherical", a sort of distorted polar coordinates, as defined by OpenGL for environment mapping.
![]() unknown: the default is "unknown", meaning that the code can assume the layout is whatever is appropriate for the usage.
unknown: the default is "unknown", meaning that the code can assume the layout is whatever is appropriate for the usage.
![]() Tiling
Tiling
![]() clamp: any "U,V,W" surface coordinate components outside the [0.0, 1.0] range are clamped to either 0.0 or 1.0, whichever is closer.
clamp: any "U,V,W" surface coordinate components outside the [0.0, 1.0] range are clamped to either 0.0 or 1.0, whichever is closer.
![]() mirror: similar to "repeat" (below), but every other modulo is inverted.
mirror: similar to "repeat" (below), but every other modulo is inverted.
![]() repeat: a modulo operation is performed on any "U,V,W" surface coordinate components outside the legal range. This is useful when you want a pattern to repeat without visible "seams".
repeat: a modulo operation is performed on any "U,V,W" surface coordinate components outside the legal range. This is useful when you want a pattern to repeat without visible "seams".
![]() Blending Mode
Blending Mode
![]() modulate: this setting is only relevant for diffuse channels. When set, the texture will modulate, rather than replace, materials that came before it (for diffuse channel n, this would be first the underlying surface color then all diffuse channels i < n.
modulate: this setting is only relevant for diffuse channels. When set, the texture will modulate, rather than replace, materials that came before it (for diffuse channel n, this would be first the underlying surface color then all diffuse channels i < n.
![]() decal: this setting is only relevant when the texture is applied to diffuse channel 0. When set, any transparent portions of the texture show the underlying diffuse color, rather than making the entire material transparent.
decal: this setting is only relevant when the texture is applied to diffuse channel 0. When set, any transparent portions of the texture show the underlying diffuse color, rather than making the entire material transparent.
![]() decal + modulate: combination of the decal and modulate settings.
decal + modulate: combination of the decal and modulate settings.
•Load Image: loads an existing image. The file types that can be loaded are: *.jpg, *.bmp, *.gif, *.png, *.tiff, and *.hsf.
•Delete Image: deletes an already loaded image.
•Clone Texture: creates a duplicate texture.
•Delete Texture: deletes the selected texture.
•Value Scale: = (scale_min, scale_max) Once the color intensities have been retrieved from the texture source, user may wish to rescale them in order to brighten or dim the overall texture. Incoming samples from the texture source are in the range 0.0 to 1.0. They are scaled to the range scale_min to scale_max.
•Down Sampling: Instructs HOOPS not to down-sample images that exceed 512x512 pixels, but instead to try and create a texture as close as possible to the original size of the image, without exceeding the texture size limit on the graphics card. For textures, many graphics cards have a limit of between 512x512 and 4096x4096 pixels. The default is "down-sampling".
•Scale: The Scale makes the image being applied to a surface either smaller or larger.
•Rotate: Rotates the image by a certain number of degrees.
•Reset: Applies to Scale and Rotate and resets them to their initial values: 50% and 0 degrees.
Process
1. Click on New Style button to add a new style.
Create New Style, and name it (in this example was named wheel).
2. Click on Diffuse and pick a color (in this case the color gray was selected). Click on Load Image button to select the Style images.
Note: The following files can be loaded as images:
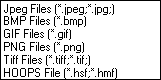
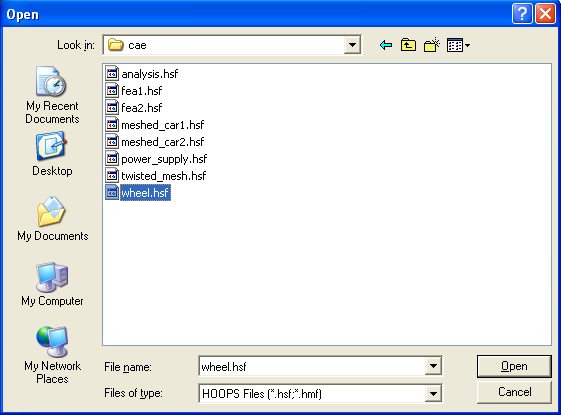
3. This will open the Open dialog box. Search for the desired image and click the Open button.
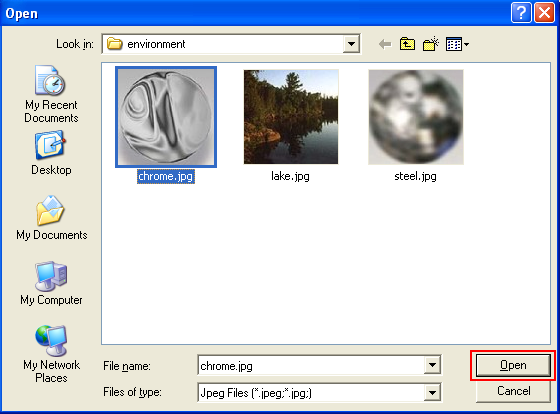
The loaded image name appears in the Texture Settings/Name.
4. Set up the Specular, Environment, Mirror, Transparency, and Gloss values for each Style, using the loaded images or the set of colors already available in the Material Editor. In this example the parameters were set to:
Wheel parameters:
Diffuse color = gray
Environment = chrome
Specular = n/a
Mirror = 10%
Transparency = 10%
Gloss = 2
Rotor parameters:
Diffuse color = environment gray
Environment = brushed metal1
Specular = chrome
Mirror = 38%
Transparency = 0%
Gloss = 42
Tire parameters:
Diffuse color = dark gray
Environment = brushed metal1
Specular = chrome
Mirror = 10%
Transparency = 0%
Gloss = 87
Caliper parameters:
Diffuse color = red
Environment = brushed metal1
Specular = chrome
Mirror = 10%
Transparency = 0%
Gloss = 87
5. Go to DCS Converter window and use Select By Single Click ![]() or Select By Window
or Select By Window ![]() , and select one of the components (wheel, tire, rotor, or caliper). You can also use Edit/Selection to activate the same functions.
, and select one of the components (wheel, tire, rotor, or caliper). You can also use Edit/Selection to activate the same functions.
6. Go to Material Editor dialog box and click Apply.
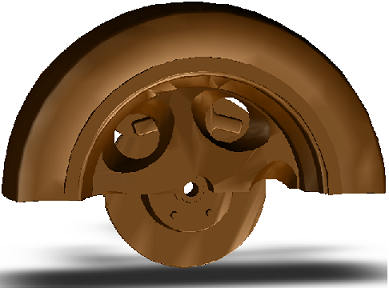
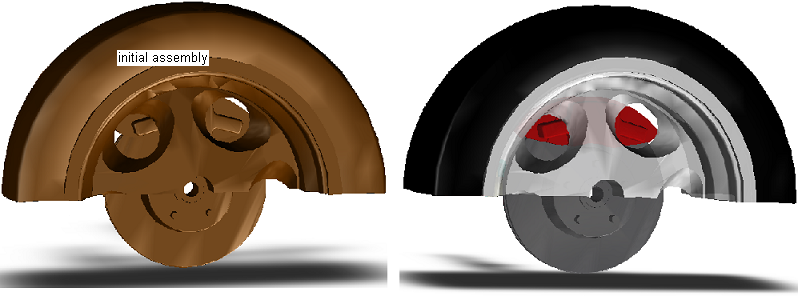
Note: Repeat steps 5 and 6 for all components. The wheel assembly will look as shown below:
7. Go to DCS Converter window and select File/Save As: to save the modified file as a Hoops (*.hsf) file.
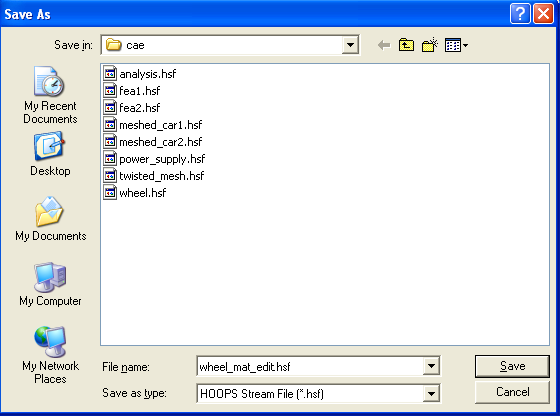
The file is ready to be loaded in 3DCS.