Building an assembly in CATIA can be done by Inserting Existing Components or by creating new parts and sub-assemblies.
|
Creating a new Assembly:
1.Users can start creating a new CATIA V5 assembly by going to the Start menu and selecting New.
2.The New list dialog will appear, allowing users to create a range of specific files or starting in a new Workbench. Start by scrolling down and selecting Product and OK.
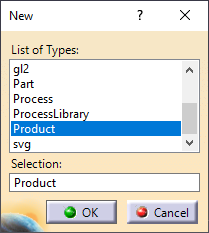
3.Selecting a Product will create a new Assembly in the Assembly Design workbench, or the Product Structure workbench. Either workbench will allow users to create new Parts or new Sub-Assemblies.
4.Right-click on the Product in the tree or select Insert
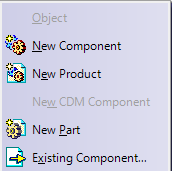
5.Select either New Product or New Part. Users can also select Existing Component, if design parts already exist.
Creating Assembly GD&T: Make sure a CATProduct file is open.
1.Go to the Start Menu and select Product Functional Tolerancing and Annotation.
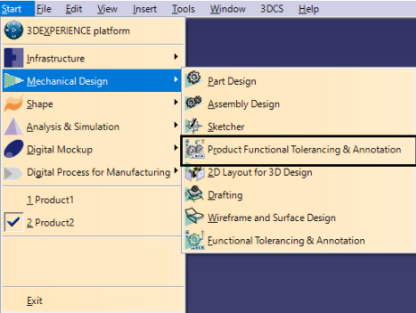
2.From here, users can use the ![]() Tolerance Advisor to create GD&T in the Assembly.
Tolerance Advisor to create GD&T in the Assembly.
Rigid Assembly 
A rigid assembly in CATIA is the main default when creating assemblies and sub-assemblies. When applying constraints to a rigid assembly, it will constraint the assembly as a whole. When extracting constraints within a rigid assembly to 3DCS, it will build the assembly the same within CATIA.
Rigid assembly example:
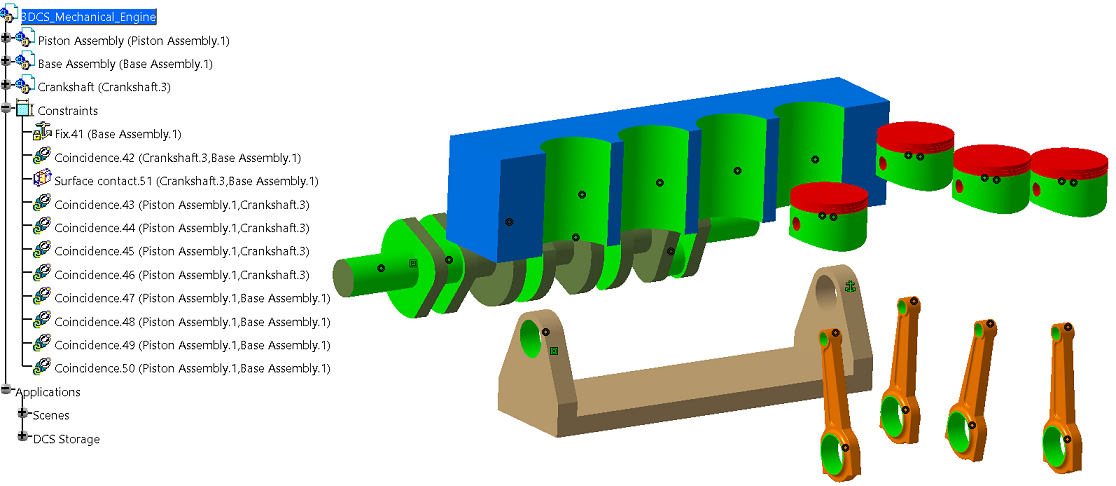
*In the above example, notice Coincidence.43-50. They are constraining the Rod to the Crankshaft; however, the link is specifying the Piston Assembly.
Flexible Assembly 
A flexible assembly in CATIA is the alternative option when creating assemblies and sub-assemblies. Sometimes CATIA will automatically set a sub-assembly to flexible. The difference in a flexible assembly, when constrained, is within the constraint. The constraint will use the selected part specifically, rather than in a rigid assembly which will constrain the whole assembly.
Flexible assembly example:
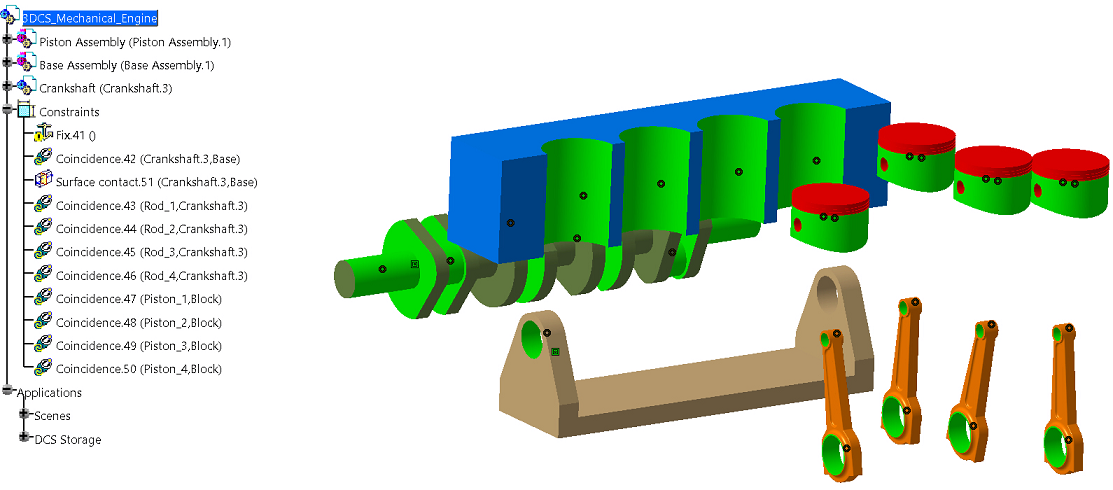
*In the same example, the Piston and Base assemblies where changed to Flexible sub-assemblies. Notice the Coincidence constraints 43-50 now refer to the actual Rod part, rather then the assembly. Modifying the assembly to flexible also caused the fix constraint to be incorrect and needs to be deleted and re-applied in the Base sub-assembly to fix the Base part.
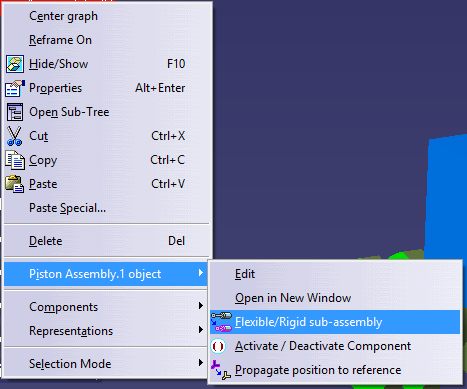
To change a sub-assembly to either Rigid or Flexible, right-click on a sub-assembly, highlight the part object in 3DCS or Assembly Design workbenchs, and select the 'Flexible/Rigid sub-assembly' icon.
Note: CATIA will change the sub-assemblies to flexible automatically in these situations:•Using or applying Enhanced Scenes. •Importing sub-mechanisms (Joints). •Applying constraints with the Snap tool (Assembly Design). |