In order to use Sub Assembly Modeling, we must first create two parts, Pivot Assy and Lever Assy, and then move the parts for each sub-assembly within each sub-assembly (Pivot and Select Pin into Pivot Assy and Lever Pin and L Lever into Lever Assy). We will then be able to create the moves for each sub assembly. Each sub assembly will function as an independent 3DCS model.
•Click the [Insert] menu and select New Product
•The New Product gets added to the bottom of the Tree
•Repeat the step to create another New Product.
•Rename the first Product to "Pivot Assy" and the second one to "Lever Assy".
•Drag and drop parts, Pivot and Select Pin into Pivot Assy.
•Drag and drop L Lever and Lever Pin into Lever Assy.
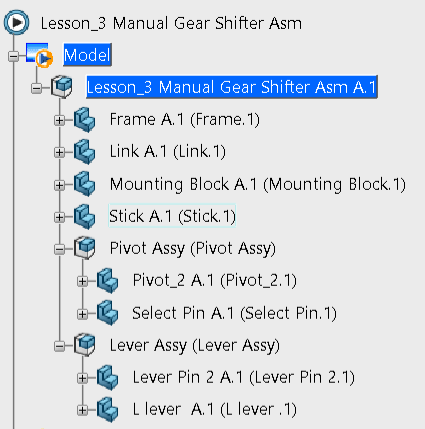
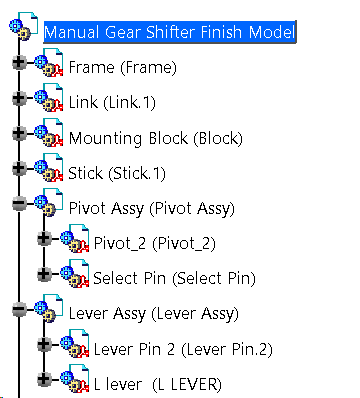
•The completed tree should look like the image below.
•From [File], select [Save Management].
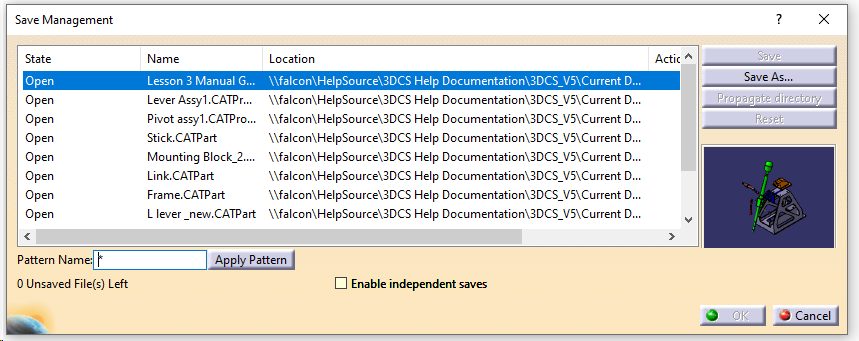
•Highlight the new Lesson_3 Manual Gear shifter Asm.CATProduct file and click [Save As].
•Navigate to the User Lessons folder.
•Click [Propagate Directory] to save a copy of the CATPart files to the new folder.
•Click [OK] in the Save Management dialog. The model is not actually saved until you click [OK].
•Select the Top Assembly and click  Create under the Geometry tab and select [Create Part] from the drop down menu.
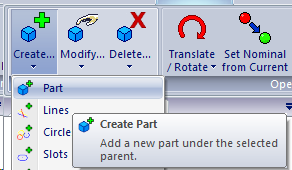
•This will add a new part to the bottom of the tree.
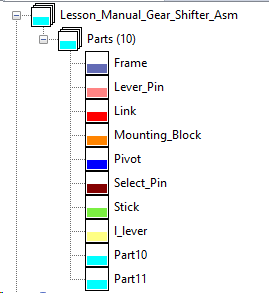
•With the Select Part dialog still up, again select the Top Assembly which will create a second part.
•The tree should look like the image below. The order of the parts may vary.
•Now double click the newly added part to open the Edit Part dialog and rename to "Pivot Assy".
•Rename the second one to "Lever Assy".
•Drag and drop parts L Lever and Lever Pin inside Lever Assy.
•Drag and drop parts Pivot and Select Pin inside Pivot Assy.
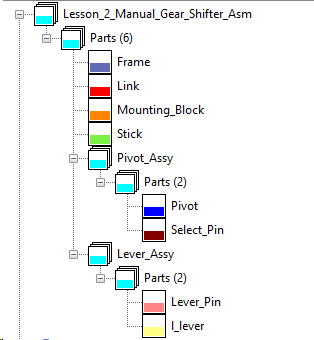
Now, we will save the model and propagate the HSF files into the same folder as the wtx file, the wtx file contains the 3DCS data.
•Click the ![]() Application Button then select
Application Button then select ![]() Save Management.
Save Management.
•Double-click the wtx file in the top row to open the Save As dialog.
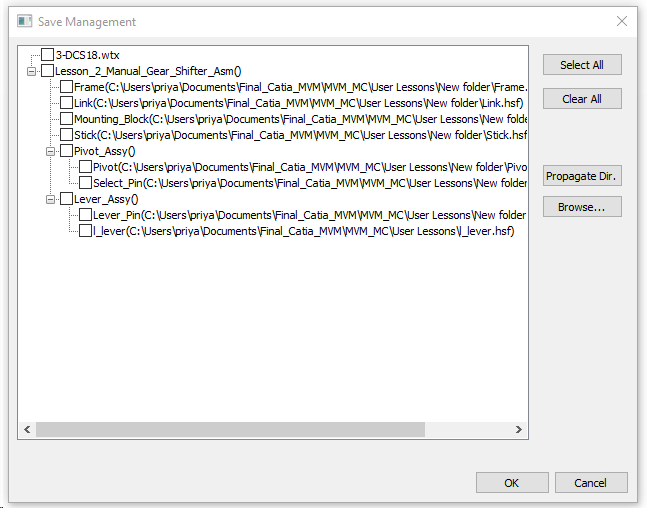
•Navigate to the User Lessons folder.
•Change the File Name to "Lesson_3 Manual Gear shifter Asm".
•Click [Save] in the Save As dialog.
•Click [Propagate Dir.] to save a copy of the hsf part files to the same folder.
Note: The files that are checked are the ones that will be saved.
•Click [OK] in the Save Management dialog. The model is not saved until you click [OK].
•Click Create New button from Assemblies Tab.

•Activate the Assemblies option from the Application Tab if it is not available.
•This will again open New Component File Dialog.
•Select Assembly and rename the File to "Lever Assy".
•Make sure to select the same Folder the Model was initially saved.
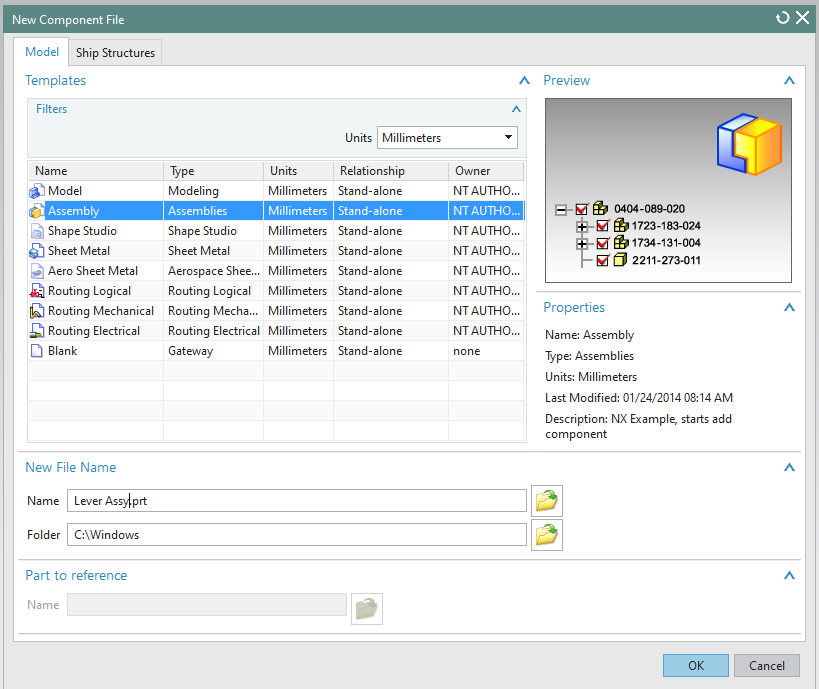
•Repeat this again to create the second Assembly and rename it as "Pivot Assy".
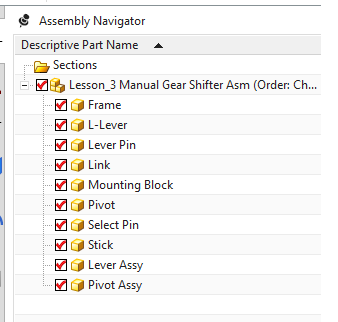
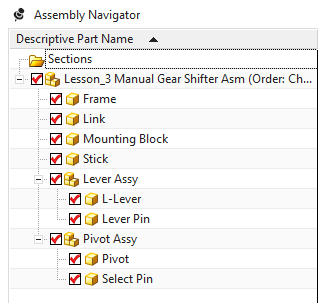
•Ctrl+ Select L Lever and Lever Pin, drag and drop inside Lever Assy.
•Ctrl+Select Pivot and Select Pin, drag and drop inside Pivot Assy.
After rearranging the tree should look like the image below.
•Save the model.
•From the Model Tab click Explode View to unexplode the model.
•From the Model Tab select Create.
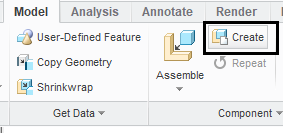
•In the Create Component dialog, select Subassembly and rename it as "Pivot Assy" and hit [OK].
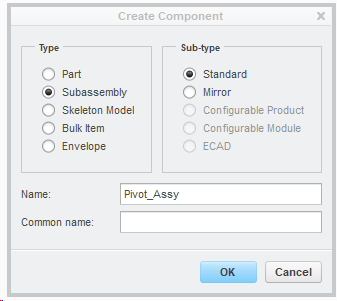
•This will open the Creation Options dialog.
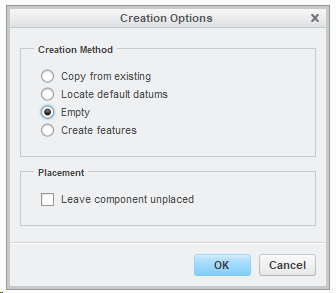
•Select "Empty" and hit [OK].
•Pivot Assy gets added to the tree.
•Repeat the same steps to create "Lever Assy".
•The tree should look like the image below.
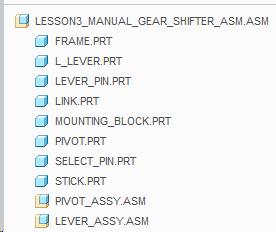
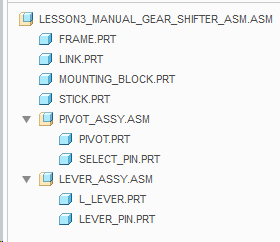
•Ctrl+Select Pivot and Select Pin drag and drop inside Pivot Assy from the tree.
•Ctrl+Select L Lever and Lever Pin drag and drop inside Lever Assy from the tree.
The completed tree should look like the image below.
•Click [Save] to save the model to the User Lessons folder.
•Click Insert Components ![]() New Assembly from the Assembly Tab.
New Assembly from the Assembly Tab.
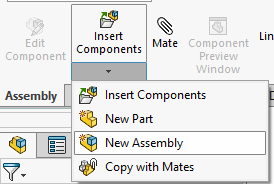
•This will add the new subassembly to the existing tree
•Repeat the step to create another subassembly.
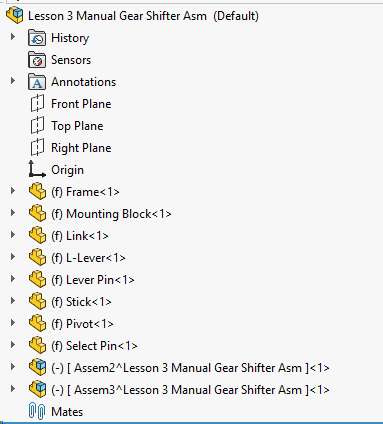
•Rename the new sub assemblies as "Pivot Assy" and "Lever Assy".
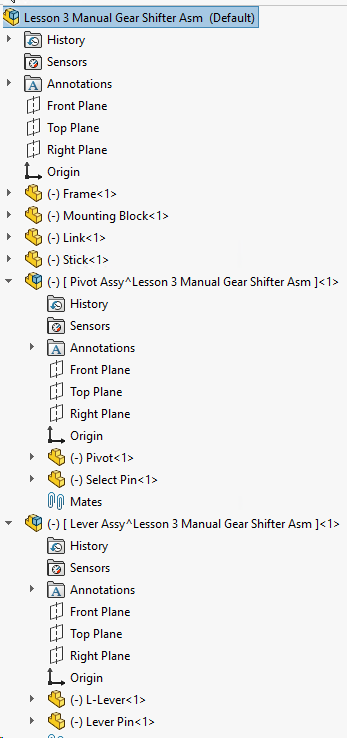
•Drag and drop Pivot and Select Pin parts inside Pivot Assy and drag and drop L Lever and Lever Pin parts inside Lever Assy.
The reordered tree should look like the image below.
•Click [File] ![]() Save to open the Save As Dialog.
Save to open the Save As Dialog.
•Save the model in the User Lessons folder.
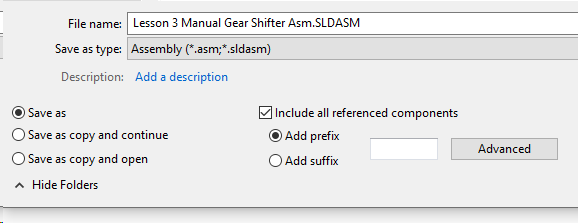
•Make sure to check Include all referenced components check box.
•Click [Save].
