Modeling parts that are identical and are used multiple times in an assembly can be created by copying (Ctrl-C) a part and then pasting by pressing the (Ctrl+shift+V) buttons. Linked parts are also referred to as instances. Changes to the parts are easier because a change to an MTM in any one of the instances will cause a change to all of the linked parts. Additionally, any changes to the related geometries will also change.
See also Cut and Paste Behavior for Linked Geometries.
|
Procedure:
1.Select part(s) to be copied by in the Navigation tree.

2.Once the desired part(s) are highlighted in the navigation tree, the user presses fast keys Ctrl+C copying the selected part(s).
3.After selecting the parts to Copy, select the part in the Navigation tree where wants to paste copied part(s). Only a single destination location (parent) may be picked even if multiple parts have been selected
4.Press the Ctrl+Shift+V key combination, which will paste the copied parts. The dialog box opens to make sure that a linked part should be created.
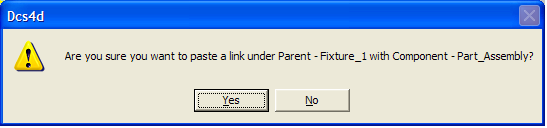
5.Selecting No exits the Paste process. If an unlinked copy is desired; use ctrl+V. Selecting Yes pastes the geometry from the buffer and looks for upstream usage of the original parts and generates the Select or Reject Items Dialog Box. Moves or measures that will also be performed on the newly created geometries should be selected. The prefix changes the names of the moves and measures that will be created. The new moves and measures have the new parts features instead of the original parts features. The moves and measures can then be edited to reflect the new parts functions in the assembly, and for the moves it will typically be the target features that need editing once they are created.
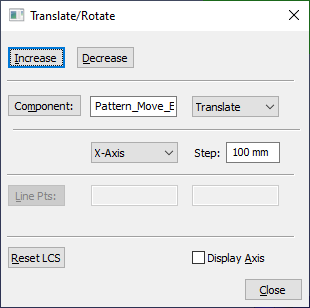
6.Optional - Translate/Rotate: The final step is to translate copied part(s) to separate position. Translation must be performed once for each part being copied.
To view or break the links in a model go to Tools ![]()
![]() Break Instance Linking. This brings up the dialog box:
Break Instance Linking. This brings up the dialog box:
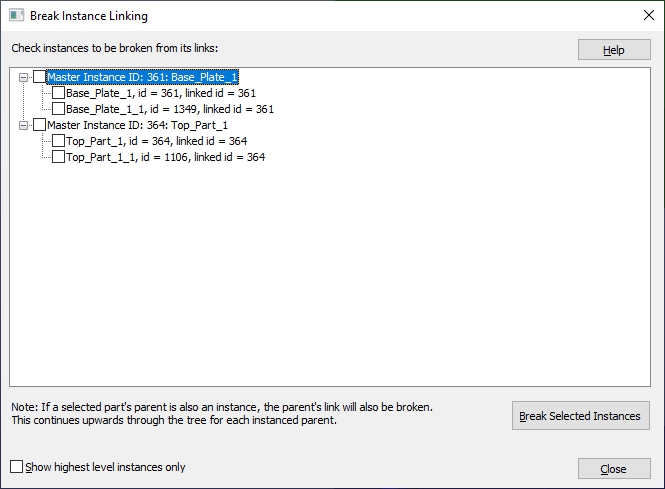
•Add a check-mark for each instance link that needs to broken, and click the Break Selected Instances button.
•Help: Opens the Help Manual at the Create Coordinate Point on Solid page.
•Close: Will close the Break Instance Linking dialog.