Now that you have completed your model, you can watch the build by build variation of the model.
•Click ![]() Nominal Build.
Nominal Build.
•Click ![]() Deviate and examine the points at the top and bottom of the gap.
Deviate and examine the points at the top and bottom of the gap.
In the assembled position, you can see the part variation changing the positions of the Headlamp and Turnlamp from build to build. The Headlamp and Turnlamp are varying due to the surface profile and hole position in the Bracket as well as the floating of the clearance between the holes and pins. In addition to the assembly build variation, you can also see the trim surfaces of the Headlamp and Turnlamp varying and affecting the gap. You can see the value of the measures change in real time as it deviates from within a measure's dialog.
•Click [Close] in the Deviate dialog.
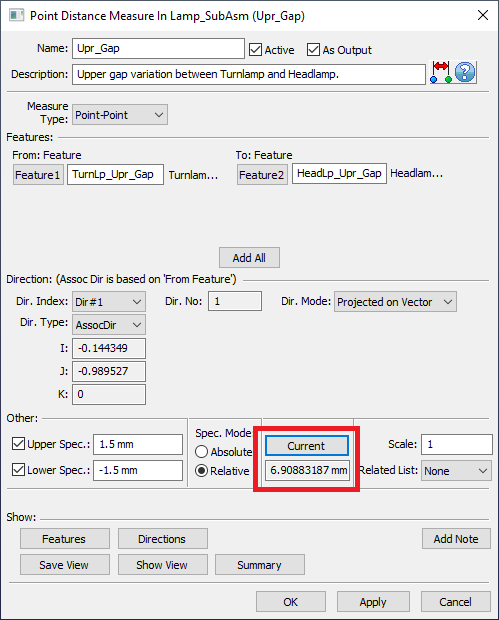
•Open the dialog for Upr_Gap by double-clicking on it in the Navigation Tree.
•Select ![]() Deviate again.
Deviate again.
•Click the [Current] button in the Point Distance Measure dialog and notice the value increase or decrease from the nominal value depending on the build. Feel free to click the [Current] button several times and watch the number update depending on what the current virtual build dictates the distance to be.
•When finished, click [Close] in the Deviate dialog.
•Select [OK] to close the Point Distance Measure dialog.
•Click ![]() Separate.
Separate.