Topics within this section:Procedure - Visualization Export using Measures Commands Best Practices: Export Measures using Sample numbers Procedure - Visualization Export using Spec Studies |
Any or all measurements and/or ![]() Spec Studies authored in 3DCS can be exported to
Spec Studies authored in 3DCS can be exported to ![]() Visualization Export.
Visualization Export.

Procedure: Visualization Export and exporting Measurements results to FBX or WRL files. Measures with Moves and Tolerances/GD&T will be required to export data through Visualization Export.
1.Run a new Simulation
2.Open the ![]() Visualization Export dialog.
Visualization Export dialog.
3.Select the Measures to export. Select the >> to add the measure to the list. Each measure will export a separate FBX or WRL file.
4.Select a folder location to create the FBX or WRL files.
5.Select either FBX or WRL.
6.Select OK.
When you export to Visualization Export the file name is chosen by the exporter. The model geometry is exported either in WRL or FBX format. FBX is the preferred method of export.
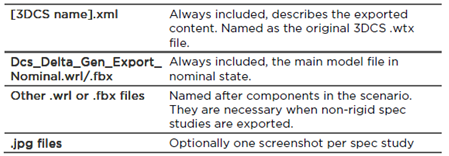
In addition to the xml the following files are created:
|
Commands
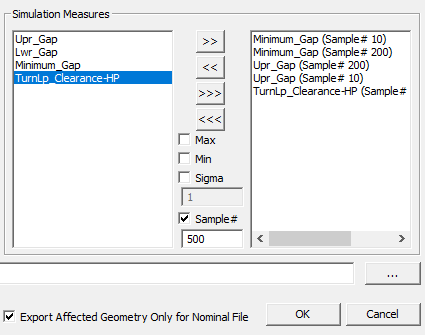
>>: Adds the selected Measure or Spec Study to the export list.
<<: Removes the select Measure or Spec Study from the export list.
>>>: Adds all Measures or Spec Studies to the export list.
<<<: Removes all Measures or Spec Studies from the export list.
Write JPEG: This options will also create a JPEG of the Spec Study and Measure views.
Merge Faces to one shape: If the CAD had multiple segments of geometry, this setting changes the view of the image to view as one surface.
WRL/FBX Export: Creates a WRL or FBX file. Only one can be selected or created at one time.
Export Affected Geometry Only for Nominal file: This generates a new FBX file of the nominal geometry. Any other geometry that is not changed will use the previous saved image(s).
Best Practice: Export Measures using Simulation number:
1.Run a new Simulation.
2.If in the Analysis Summary window, select the measure or double-click on a measure.
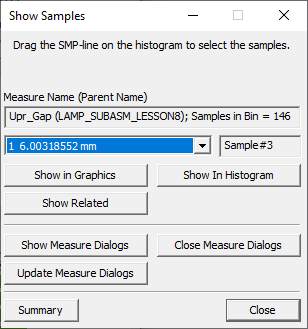
3.Select the View tab and select Show Samples option.

4.In the list, select any of the Sample numbers. Select [Show in Graphics] to view the build.
oUsers can also use Deviation Control and build to One Step. The Current Step will refer to the Sample number.
5.Keep the Simulation window open.
In the Visualization Export dialog:
1.From the list of measures, select a measure and then type in a Sample number.
2.Select the >> to add it to the list to export as a FBX or WRL file. Each measure can have multiple Sample numbers in the list.

3.Select [OK] when ready to create the files.
Procedure: Visualization Export and exporting Spec Studies either FBX or WRL files. For this process, Spec Studies will are required to be created in the model. To create Spec Studies, view the Spec Study creation process.
1.Open the ![]() Visualization Export dialog.
Visualization Export dialog.
2.Select a folder location to create an FBX or WRL files.
3.Select the Spec Study from the list and then select >> to add to the list to be exported.
4.Select OK.
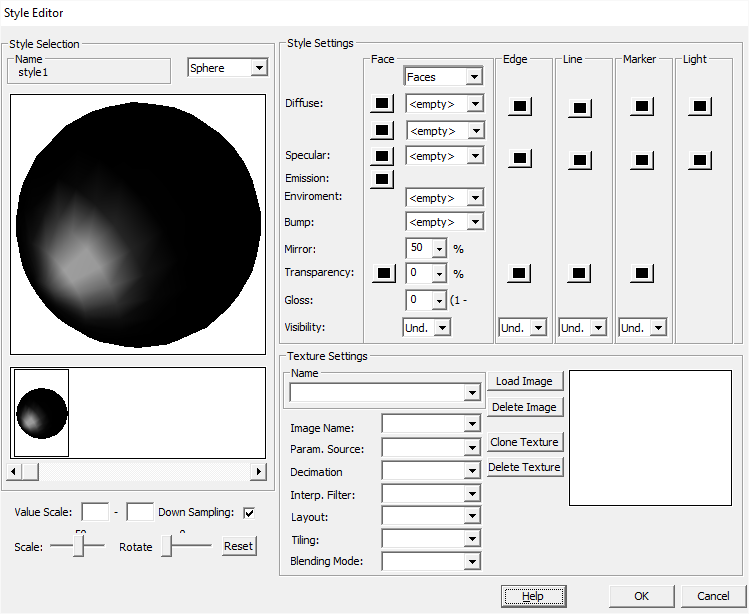
Style options: Materials that are applied in 3DCS will be transferred to Visualization Export automatically upon export.

Using ![]() Visualization Export, in the integrated platforms, will export the geometry with 3DCS Measurement and Spec Study data. Additionally, this function will export any material or visualization applied to the geometry. Please see the material guide for your respective CAD system to add material.
Visualization Export, in the integrated platforms, will export the geometry with 3DCS Measurement and Spec Study data. Additionally, this function will export any material or visualization applied to the geometry. Please see the material guide for your respective CAD system to add material.
