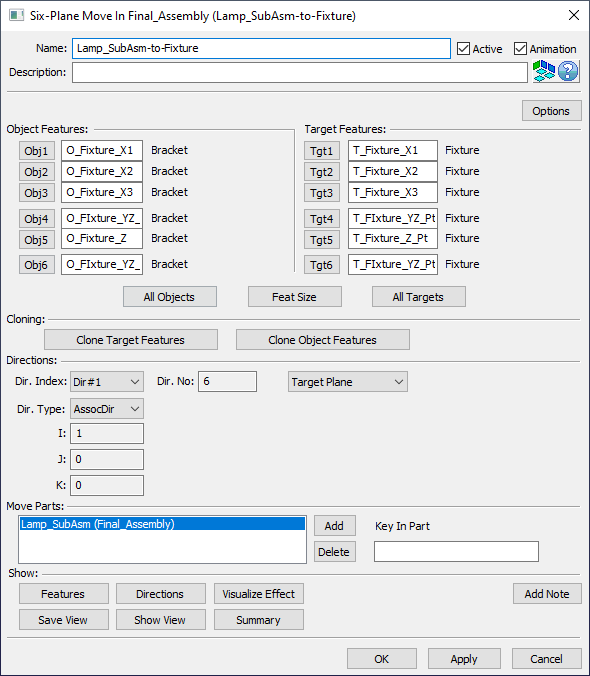
Next we must create a Move that can move the now assembled Lamp_SubAsm to the Fixture.
•Create a Six-Plane Move to move the subassembly to the Fixture. Because the move should be at a level above the Lamp_SubAsm_Lesson6 and Fixture, the move parent part should be the Final_Assembly. Name the move "Lamp_Sub_Asm-to-Fixture". Use the points O_Fixture_X1, O_Fixture_X2, and O_Fixture_X3 as the primary features; use the point O_Fixture_YZ_Pt as the 4-way locator; and use the feature slot O_Fixture_Z as the 2-way locator in the Bracket. Move these to the corresponding points in the Fixture.
•In the Move Parts box, make sure Lamp_SubAsm_Lesson6 is selected.
The completed Six-Plane Move dialog should look like the image below.

•Use ![]() Nominal Build or
Nominal Build or ![]() Animate to verify the move is correct.
Animate to verify the move is correct.
•Click ![]() Separate.
Separate.
•Save the model.