Within this Section:How to Change a Move to a different Move type How to reorder Moves |
How to create a new Move:
1.Select ![]() Move list dialog from the Model Creation toolbar.
Move list dialog from the Model Creation toolbar.
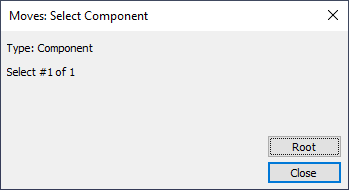
2.Select an assembly where the move will be created in, or select [Root] from the Select Component dialog. Selecting Root will create the move at the top level assembly.
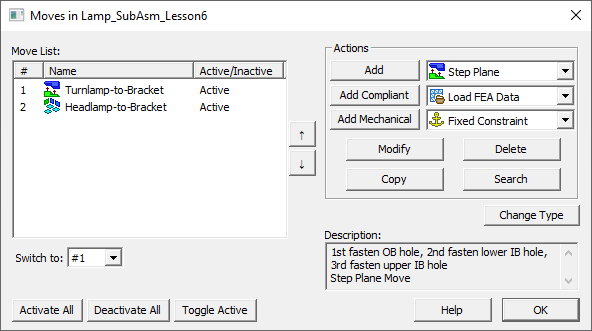
3.A Move List dialog box listing existing moves and different move types to create is displayed.
a.This same dialog box can be also found by double-clicking on the Move list in the 3DCS Model Tree.
4.When finished entering parameters, they may be saved by clicking the [OK] or [Apply]. The [OK] button will save the edited parameters and close the Move dialog. [Apply] will keep the Move dialog open and apply the changes made to the Move. The Cancel button exits the dialog without saving it. See the Common Parameters help page for information on common fields.
5. Click the [Add New] button to add the existing move and refresh the move dialog to create a new one without having to close and reopen.
How to edit an existing Move:
All the existing moves in the model will appear in the Move List.
1.Select ![]() Move list dialog and then select the Assembly, sub-assembly or [Root], or double-click on the move in the list.
Move list dialog and then select the Assembly, sub-assembly or [Root], or double-click on the move in the list.
2.Select on a move in the Move list and press the [Modify] button.
3.Modify the move as required. When finished modifying parameters, the move may be saved by clicking the [OK] button or [Apply] button.
How To delete an existing Move:
All the existing moves in the model will appear in the Move List.
1.Select ![]() Move list dialog and then select the Assembly, sub-assembly or [Root], or double-click on the move in the list.
Move list dialog and then select the Assembly, sub-assembly or [Root], or double-click on the move in the list.
2.Select a move in the Move list dialog and press the [Delete] button. Click [OK] in the confirmation window to delete the move.
a.To delete multiple moves at the same time, select the moves by clicking on each one while holding the Ctrl key, then press the [Delete] button.
How to copy an existing Move:
1.Select ![]() Move list dialog and then select the Assembly, sub-assembly or [Root], or double-click on the move in the list.
Move list dialog and then select the Assembly, sub-assembly or [Root], or double-click on the move in the list.
2.Select the move to copy from the ![]() Move list dialog.
Move list dialog.
3.Select [Copy]. Copy will allow the user to Copy the same move to a new Part or Assembly level location. Right-click on the new part and select Paste.
a.Right-click on any Move in the Model Navigator and select [Copy] or [Quick Copy]. [Quick Copy] will copy the move under the original move, copying all the parameters from the original move.
To Convert a Move from One Type to Another:
Select ![]() Move, Select a move in the Move list and press the Change Type button. Select the new move type from the list.
Move, Select a move in the Move list and press the Change Type button. Select the new move type from the list.
All features, directions and Move parameters will be converted. Check the new move after changing the type. Compliant and Mechanical Moves cannot be changed to a different type. |
Move Types |
Moves able to Change |
Best Moves to convert to |
Step Plane |
Yes |
Six Plane, Three Point |
Six Plane |
Yes |
Step Plane, Three Point |
Feature Move |
No |
N/A |
Best-Fit |
No |
N/A |
Pattern Move |
Yes |
|
Two Point |
Yes |
|
Three Point |
Yes |
|
Match |
Yes |
Three Point, Two Point, Six Plane |
Iteration |
No |
N/A |
Pattern-Fit |
Yes |
|
Transform |
No |
N/A |
Thermal Scaling |
No |
N/A |
User-DLL |
Yes |
|
Auto-Bend |
No |
N/A |
R-Touch |
Yes |
|
Rotate Line |
Yes |
|
Gravity |
Yes |
|
LSQ Axis |
Yes |
|
Cross Product |
No |
N/A |
Line-Plane |
Yes |
Three Point, Step Plane |
Re-ordering Moves in the Move list:
•Select ![]() Move and then select the [Switch To]: drop-down list. Select the index number from the list to change the selected Move's order. The selected Move will move to the place specified by the [Switch To] index.
Move and then select the [Switch To]: drop-down list. Select the index number from the list to change the selected Move's order. The selected Move will move to the place specified by the [Switch To] index.
•Users can also use the ![]() or
or ![]() arrows, next to the Move list field. One or more Moves in the list can be selected and moved.
arrows, next to the Move list field. One or more Moves in the list can be selected and moved.
Using Feature Groups in the Move list dialog:
Users can add Feature Groups to the Move lists, to allow Move to be stored in a customized list.
•While a Feature Group is active in the Move list dialog, the next created measure will be created in the Feature Group.
•If any Feature Groups exist in the Move list, only the selected Feature Group List will show the available Moves.
Feature Groups can alter the move order when setting up Feature Groups or ordering in different order and different groups.. |