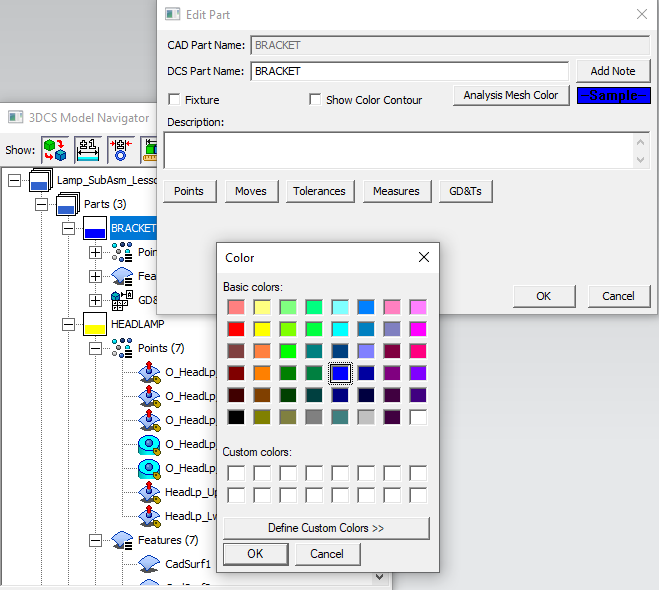
The Edit Part dialog allows the user to edit the name of the part in 3DCS, add a description, change the part's mesh color; and add a Part Note.
|
To view the Edit Part dialog, double-click the part node in the 3DCS Model Navigator.
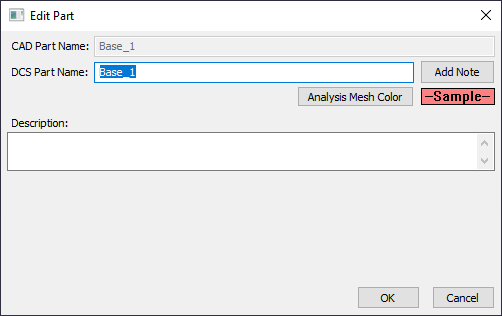

CAD Part Name: The name of the CAD Part will be taken from the part in the assembly. This name cannot be edited or changed, unless changed in the assembly.
DCS Part Name: This name can be changed by the user and displayed using Alias Display in the Preferences.
Add Note: Add text or images that will be included in the report.
Note: Users will need to utilize the Editing File in External Editor dialog. Edit the note and then Save to File.
•If using Microsoft Word DO NOT CLOSE Word, return to 3DCS and select [Save to File] button.
•If using Google Docs, edit the notes, return to 3DCS and select [Save to File] button.
oDelete document from Google Drive when finished - removes the document from the user's Google Drive. (Keeping it is not required).
Description: To change or add a Description to the part, type a description in the box under Description.
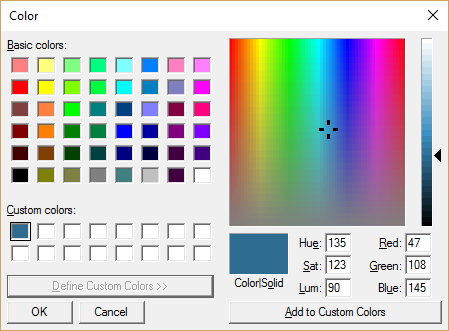
Color: Clicking on the Color button brings up the Color dialog box from which the color of the part can be changed.
Modeling Access buttons: Click the Move, Tolerance, Measure, Point, or GD&T buttons to access those functions. This will open the selected function list dialog.
Show Triaxis: Add a check box to Show Triaxis option to display the Part's LCS in the Graph window.
Fixture: Check the Fixture box to make the part a fixture. This feature allows a sub-assembly to be moved without also moving any fixtures within it.
HSF Color: If linking the part to an HSF file, select the desired HSF Color option.
Browse: Clicking on the "..." browse button allows you to select an HSF file to be linked to the part.
Load: Clicking on the Load check box will load or unload the HSF file.
Clear: Clicking on the Clear File button will remove the path of the HSF file.
HSF File: Displays the loaded file name along with the file path.
When mesh is created, the mesh is given a default color. The color is usually picked up from the part, which is sometimes difficult to see, especially when all the mesh is the same color. Once the mesh is created, the user can change the color of both the points and the mesh.
Procedure:1.Double-click on a Part node in the 3DCS Model Navigator. 2.In the Edit Part dialog, select the Color button. 3.The Edit Color dialog will appear. Select the new color or create a custom color for the part's Points and Mesh. |
|
Using Custom Colors: to add a new color, other than what is defaulted. 1.Click on Define Custom Colors, 2.Slide the arrow on the far right, down to a new shading level, 3.Select a new color in the Color Palette, 4.Select Add to Custom Colors. Once the new color is added, it will show in a selected Custom Colors square.. |
|