The Parts that have stored part location will be displayed in the tree with a unique mask icon.
|
Procedure:
1.Make the assembly is fully loaded and in the design position.
2.Select ![]() Store Part Location, located in the Update Model menu.
Store Part Location, located in the Update Model menu.
Best Practices and Methods:
Utilize this function when first creating a 3DCS model. Before starting with make points or move parts out to view the 3DCS Moves, select ![]() Store Part Locations.
Store Part Locations.
Using Copy Data with Stored Part Location: When a part is moved, exploded, translated, etc., use the current location of the part and copy points to the Design Position.
1.In Copy Data, select the parts top copy Points to.
2.Make sure the Copy Point Method is set to Stored Part Locations.
3.Select the Points and copy them to to the part the Move part will move to. When the points are copied, the Design Positions coordinate system will be used to locate the new points.
Using Edit Point dialog with Stored Part Location: Starting from the Design Position part, and another part was already moved away from the Design Position part and contains the points for the Move:
1.Open the Edit Point dialog on the Design Position part/sub-assembly.
2.Make sure the Copy Point Method is set to Stored Part Locations.
3.Select the [Select] button and select the points on the translated part.
4.When prompted, select Yes when copying the Point using Stored Coordinates.
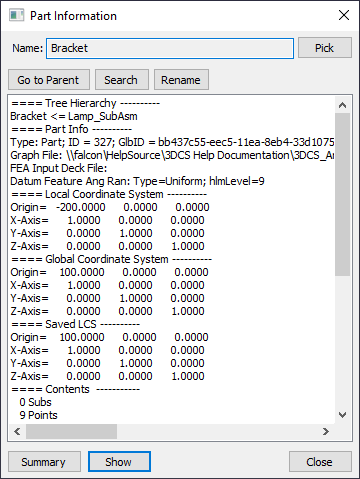
Showing Part Info (RH-click the part in the Tree to select it) will display the 'Saved LCS' information if a Stored Part Location has been saved.