Whenever you create a point, 3DCS assigns a default point name. We will change these default names to make them more informative.
•Navigate to the Points section for Turnlamp in the Navigation Tree.
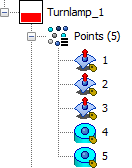
Notice the different icons for the points created on the surfaces and the points created at the center of the pins. 3DCS uses several different icons to communicate information about Feature Points in the Navigation Tree. The most common ones are the following:
![]()
![]() Point on Surface
Point on Surface
![]()
![]() Point at Center of Pin
Point at Center of Pin
![]()
![]() Point at Center of Hole
Point at Center of Hole
•Click the ![]() Points button then select the Turnlamp. This will open the Points dialog.
Points button then select the Turnlamp. This will open the Points dialog.
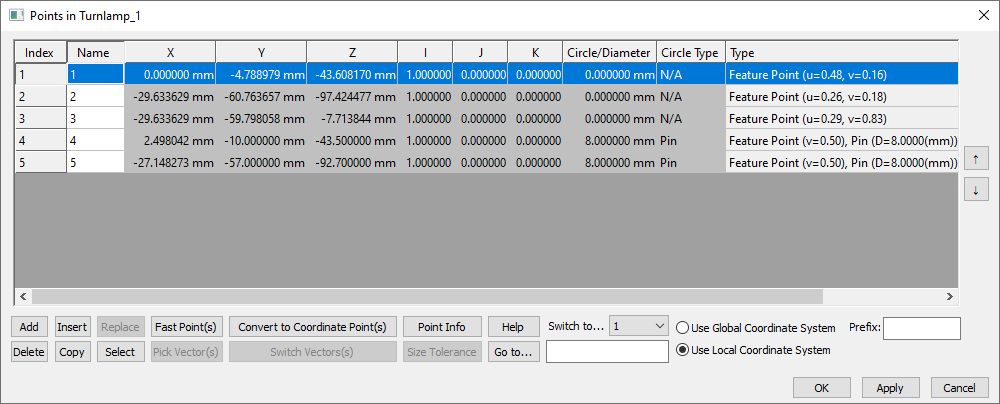
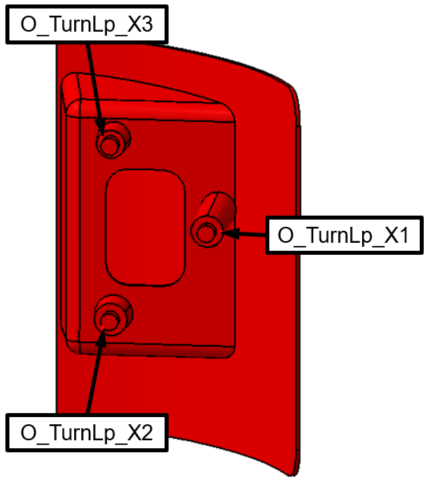
•Select a point in the list and rename it by changing the text in the Name field. Rename point 1, 2, and 3 according to the image below. (These are the points created on the faces, not the center points of the pins. Rename the point based on its location. This may be different than the order you created the points. This will eliminate confusion later in the tutorial when the points are referenced by name.) Note that because the Turnlamp is an Object part (not a Target part) in the Move we will create in the following lesson, we precede the point names with an "O" to help us stay organized.
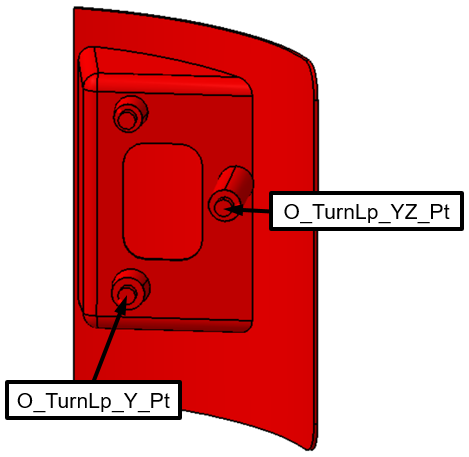
•Rename the pins' center points according to the image below.
•Click [OK] to apply the changes and close the Points dialog.
•Click the ![]() Points button then select the Headlamp.
Points button then select the Headlamp.
•Rename the points in the Headlamp according to the image below. Similarly, the Headlamp is an Object part so an "O" also precedes its point names.
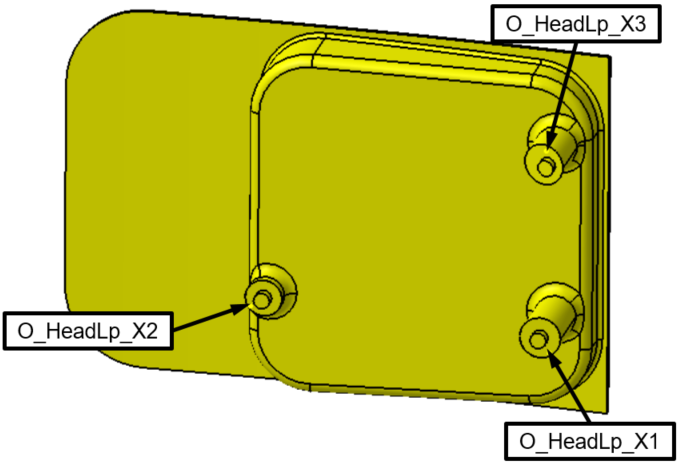
•Rename the pins' center points according to the image below.
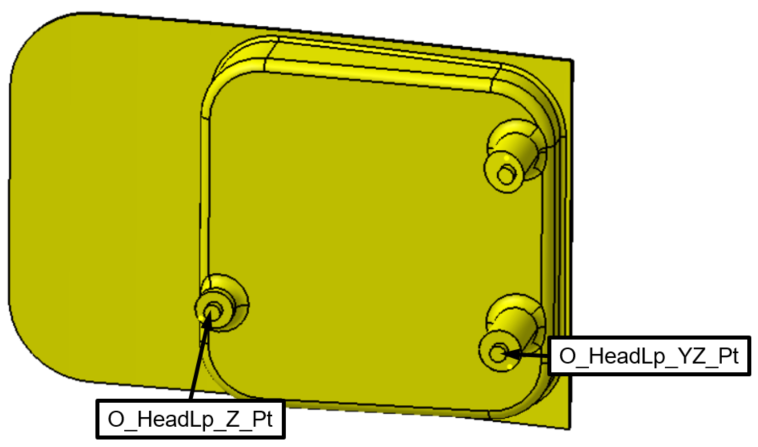
•Click [OK] to close the Points dialog in the Headlamp.