The Turnlamp and Headlamp locate to the Bracket. For the 3DCS Moves, the points on the Turnlamp and Headlamp need corresponding points on the Bracket to move to. To create points on the Bracket , the easiest way will be to copy the Feature Points from the Headlamp and Turnlamp parts. When points are copied, the new points are created as Coordinate Points because they are not associated with any features of the part.
•Click ![]() Copy Data. This will open the Copy Data dialog.
Copy Data. This will open the Copy Data dialog.
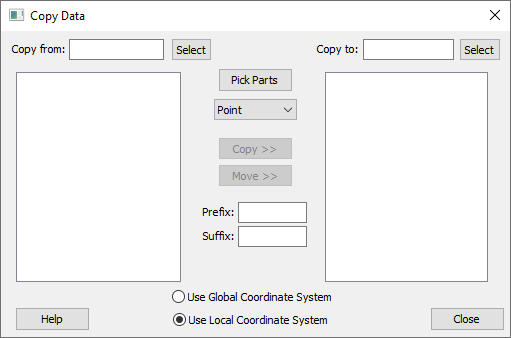
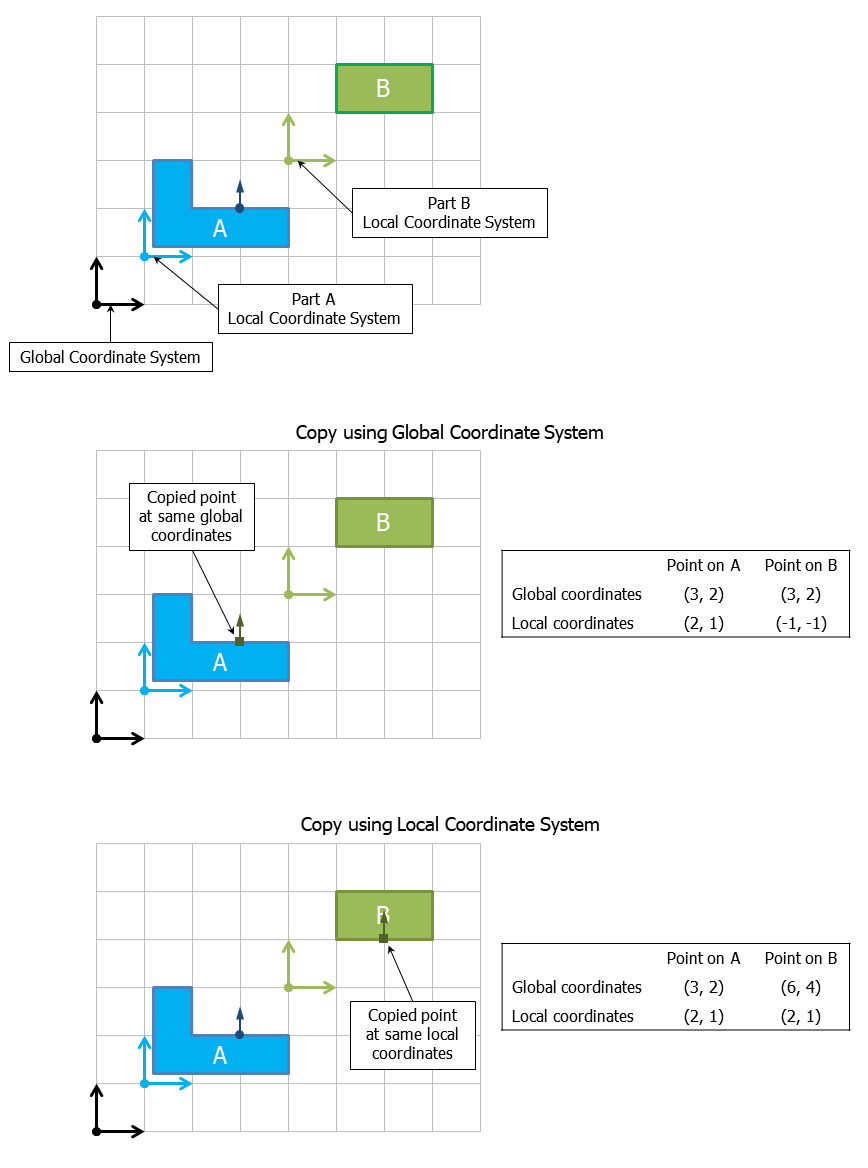
![]() Copy Data allows the user to copy or move Points, Moves, Tolerances, GD&Ts, Measures, or Spec Study items from one component to another. The coordinate system setting determines how points are copied. Use Global Coordinate System copies points using the overall assembly's coordinate system. Use Local Coordinate System copies points using the coordinate systems of the two selected components. Translating a component will change the Global Coordinates of a point but not the Local Coordinates. The illustration below shows the difference between copying a point with Global Coordinates vs. Local Coordinates. In
Copy Data allows the user to copy or move Points, Moves, Tolerances, GD&Ts, Measures, or Spec Study items from one component to another. The coordinate system setting determines how points are copied. Use Global Coordinate System copies points using the overall assembly's coordinate system. Use Local Coordinate System copies points using the coordinate systems of the two selected components. Translating a component will change the Global Coordinates of a point but not the Local Coordinates. The illustration below shows the difference between copying a point with Global Coordinates vs. Local Coordinates. In ![]() Copy Data, items may be copied or moved in either direction. Points are always copied as Coordinate Points.
Copy Data, items may be copied or moved in either direction. Points are always copied as Coordinate Points.
•Click [Pick Parts].
•Select the Turnlamp then select the Bracket.
•Select Point in the drop-down list below [Pick Parts].
•Select Use Local Coordinate System for the coordinate system setting.
•Select all points in the list for the Turnlamp. To select multiple points, hold the [Ctrl] key or [Shift] key when clicking points,or click and drag.
•With the Turnlamp points highlighted, click [Copy>>]. A copy of the Turnlamp points should now appear under the Bracket.
•Click the [Select] button next to the Turnlamp then select the Headlamp.
•For the Headlamp points, we do not need to copy O_HeadLp_Z because we will use a slot instead of a hole (this will be addressed later). Select all other points in the list for the Headlamp then click [Copy>>]. A copy of the four copied Headlamp points should now appear under the Bracket.
•Click [Close] to close the Copy Data dialog. Notice that the points have been added to the Bracket in the graphics window.
•Click the ![]() Points button then select the Bracket.
Points button then select the Bracket.
You should now have nine points in the Bracket. The Points dialog for the Bracket should look like the image below. Your coordinates may be slightly different.
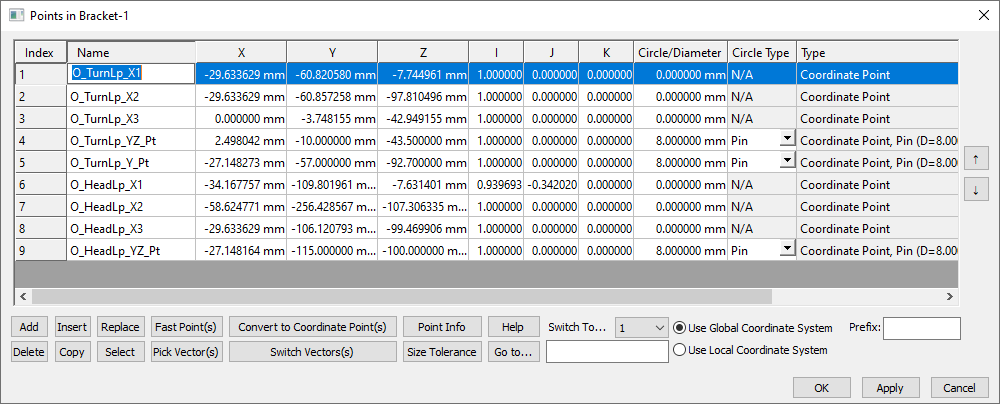
These nine points in the Bracket represent the Target counterpart to the Object points of the Turnlamp and Headlamp points so we will now change the names to maintain the good modeling practice of having unique point names in our model.
•Replace the "O" at the start of each point name in Bracket with a "T"
The completed Points dialog in Bracket should look like the following image.
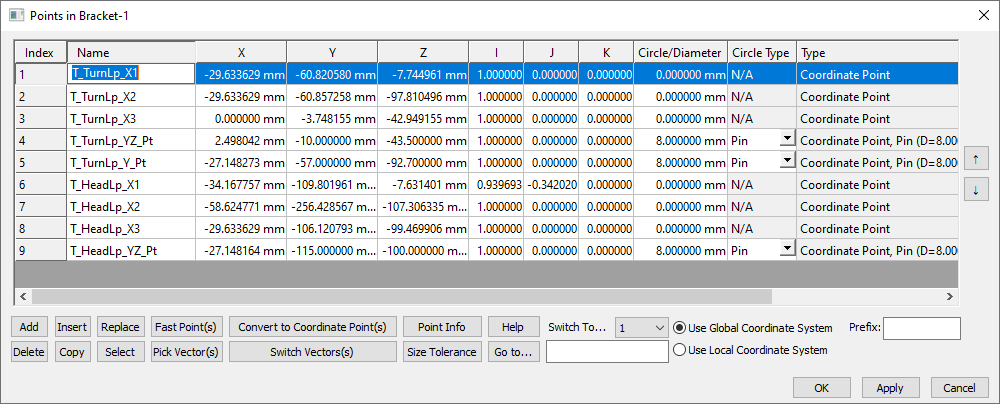
•Select [OK] in the Points dialog to save and close the Points dialog.