There are several Measure options available which determine how the Measure will be taken.
The assembly stage, at which a Measure is defined, is also critical. A Measure defined at a particular assembly stage, will reflect all the variation for the buildup for that assembly stage.
Topics about 3DCS Measures:Within this Section:How to Change a measure's type |
How to create a new Measure:
1.Select ![]() Measure to open the Measure list dialog.
Measure to open the Measure list dialog.

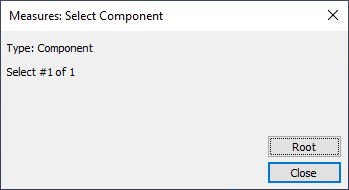
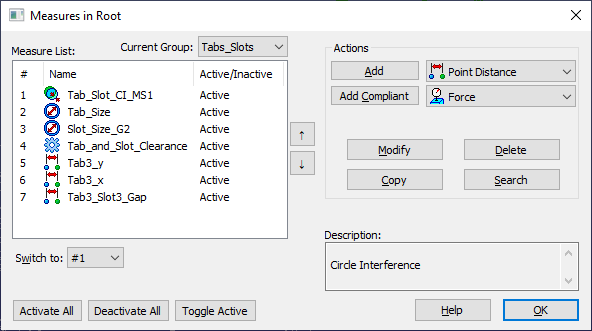
2.Select an assembly, sub-assembly from the Model Navigator or select [Root]. A Measure List dialog will open.
a.Users can also double-click on the ![]() Measures icon from 3DCS Model tree.
Measures icon from 3DCS Model tree.

3.Select a measure from the list and select [Add].
4.Click the [OK] button or [Apply] button when finished. The [OK] button will create and close the measure. [Apply] will create and keep the Measure dialog open. [Cancel] button exits the dialog without saving it and returns you to the Measure List dialog.
5. Click the [Add New] button to add the existing measure and refresh the measure dialog to create a new one without having to close and reopen.
How to edit an existing Measurement:
1.Select the ![]() Measures icon on the Model Creation toolbar.
Measures icon on the Model Creation toolbar.
2.Select an assembly or sub-assembly from the Model Navigator, or select [Root]. All the existing measurements in the assembly or sub-assembly will appear in the Measure list.
3.Select a measure in the ![]() Measure List dialog and press the [Modify], or double-click on the measure in the list.
Measure List dialog and press the [Modify], or double-click on the measure in the list.
How to delete a Measure:
1.Select the ![]() Measures icon on the Model Creation toolbar.
Measures icon on the Model Creation toolbar.
2.Select an assembly or sub-assembly from the Model Navigator, or select [Root].
3.Select the measure in the Measure List dialog and press the [Delete] button. Click OK in the confirmation dialog to delete the measurement. To delete multiple measurements at the same time, simply select the measures by clicking on each measure, while holding the Ctrl key. Then press the [Delete] button.
How to copy an existing Measure:
1.Select the ![]() Measures icon on the Model Creation toolbar.
Measures icon on the Model Creation toolbar.
2.Select an assembly or sub-assembly from the Model Navigator, or select [Root].
3.Select the measure to copy and press the [Copy] button.
a.Users can also right-click on a measure, in the Model Navigator, and select either Copy/Paste or Quick Copy. Copy and Paste route will require the user to pick part to copy the measure to. Quick Copy will copy the selected measure under the measure in the tree. Quick Copy will also copy all set parameters from the original measure.
b.The user can also copy or move measures from one part to another by using the ![]() Copy Data function. Whenever the destination assembly/sub-assembly is located at a different level or in another sub-assembly, a warning will display to let the user know that the features used in the measure are not within the part.
Copy Data function. Whenever the destination assembly/sub-assembly is located at a different level or in another sub-assembly, a warning will display to let the user know that the features used in the measure are not within the part.
Reordering Measures in the Measure List Window:
1.Select the ![]() Measures icon on the Model Creation toolbar.
Measures icon on the Model Creation toolbar.
2.Select an assembly or sub-assembly from the Model Navigator, or select [Root].
3.Select a number from the [Switch To] drop-down list, or use the ![]() or
or ![]() buttons to the right of the Measure list dialog.
buttons to the right of the Measure list dialog.
4.Select the index number from the drop-down which you would like the highlighted Measure moved to.
5.The selected Measure will move to the place specified by the Switch To index.
Using Feature Groups in the Measure list dialog
Feature Groups:
Users can add Feature Groups to the Measure lists, to allow Measure to be stored in a customized list.
•While a Feature Group is active in the Measure list dialog, the next created measure will be created in the Feature Group.
•If any Feature Groups exist in the Measure list, only the selected Feature Group List will show the available Measure.